Most people underestimate what a bathroom renovation in Dubai actually involves until they are already mid-project, facing unexpected costs and delays. The reality is that transforming a bathroom here is not simply a matter of swapping out tiles and fixtures. It requires navigating specific building regulations, working with the local climate in mind, and coordinating multiple tradespeople across a tight timeline.
The stage that matters most is also the one nobody sees. Waterproofing sits under every tile and behind every wall, and when it fails in a stacked building, the damage shows up in someone else's ceiling before it shows up in yours.
Why Waterproofing Failure Is the Real Risk in Any Dubai Bathroom
A bathroom renovation in Dubai can fail completely without producing a single visible sign at the point of handover. Moisture migrating through a compromised membrane does not announce itself immediately; it moves slowly through the substrate, the screed, and eventually the structural slab, often surfacing as a damp patch, staining, or ceiling deterioration in the unit directly below. By the time that damage is visible, the membrane is buried under tiles, the contractor has long since left, and the cost of rectification falls on whoever can be held liable.
In Dubai's predominantly stacked apartment buildings, that liability question becomes serious very quickly. A single compromised wet-room floor creates a cross-boundary damage scenario involving your downstairs neighbour, building management, and potentially a dispute process under RERA and DLD frameworks. The financial exposure is not limited to the repair of your own bathroom; it extends to making good the damage in the unit below, which can mean replacement of ceilings, electrical fittings, flooring, and any built joinery affected by prolonged moisture ingress.
Application Error, Not Product Failure, Is the Root Cause
The most important thing to understand about waterproofing failure is that the membrane product is rarely at fault. The failure is almost always in the application: insufficient surface preparation, missed or under-applied upstands at wall-to-floor junctions, membrane applied too thinly at corners and seams, or tiling proceeding before the membrane has fully cured. These are sequencing and workmanship errors, and they are invisible once the tiles go down. Building inspectors across the region consistently identify these same failure points in newly renovated bathrooms, including work that was signed off and occupied before the defect became apparent.
Partial application is a particularly common and costly error. Tanking only the shower tray area and leaving the broader wet-zone floor unprotected creates an open pathway for water to migrate through every unprotected section regardless of how well the covered area performs. Full tanking of the floor area, with the membrane turned up all walls to the correct height across every wet zone, is not a premium specification; it is the minimum required to make the system function. Anything short of that is a liability dressed up as a cost saving.
How We Approach It at Halo
Our waterproofing system, Halo Shield, is applied and inspected in-house before any substrate preparation or tile work begins. No tile is laid until the wet room has been water-tested to confirm membrane integrity across the full floor and upstand coverage. This is not a procedural formality; it is the stage that determines whether the rest of the renovation holds. Skipping or abbreviating it to recover time on a programme is the single most consequential error we see in bathroom renovations carried out without structured inspection protocols.
If you are planning a bathroom renovation in Dubai, speak to our team before stripping a single tile. The sequence of work matters more than any finish selection you will make further down the line.
Strip-Out: Protecting the Structure and the Unit Below
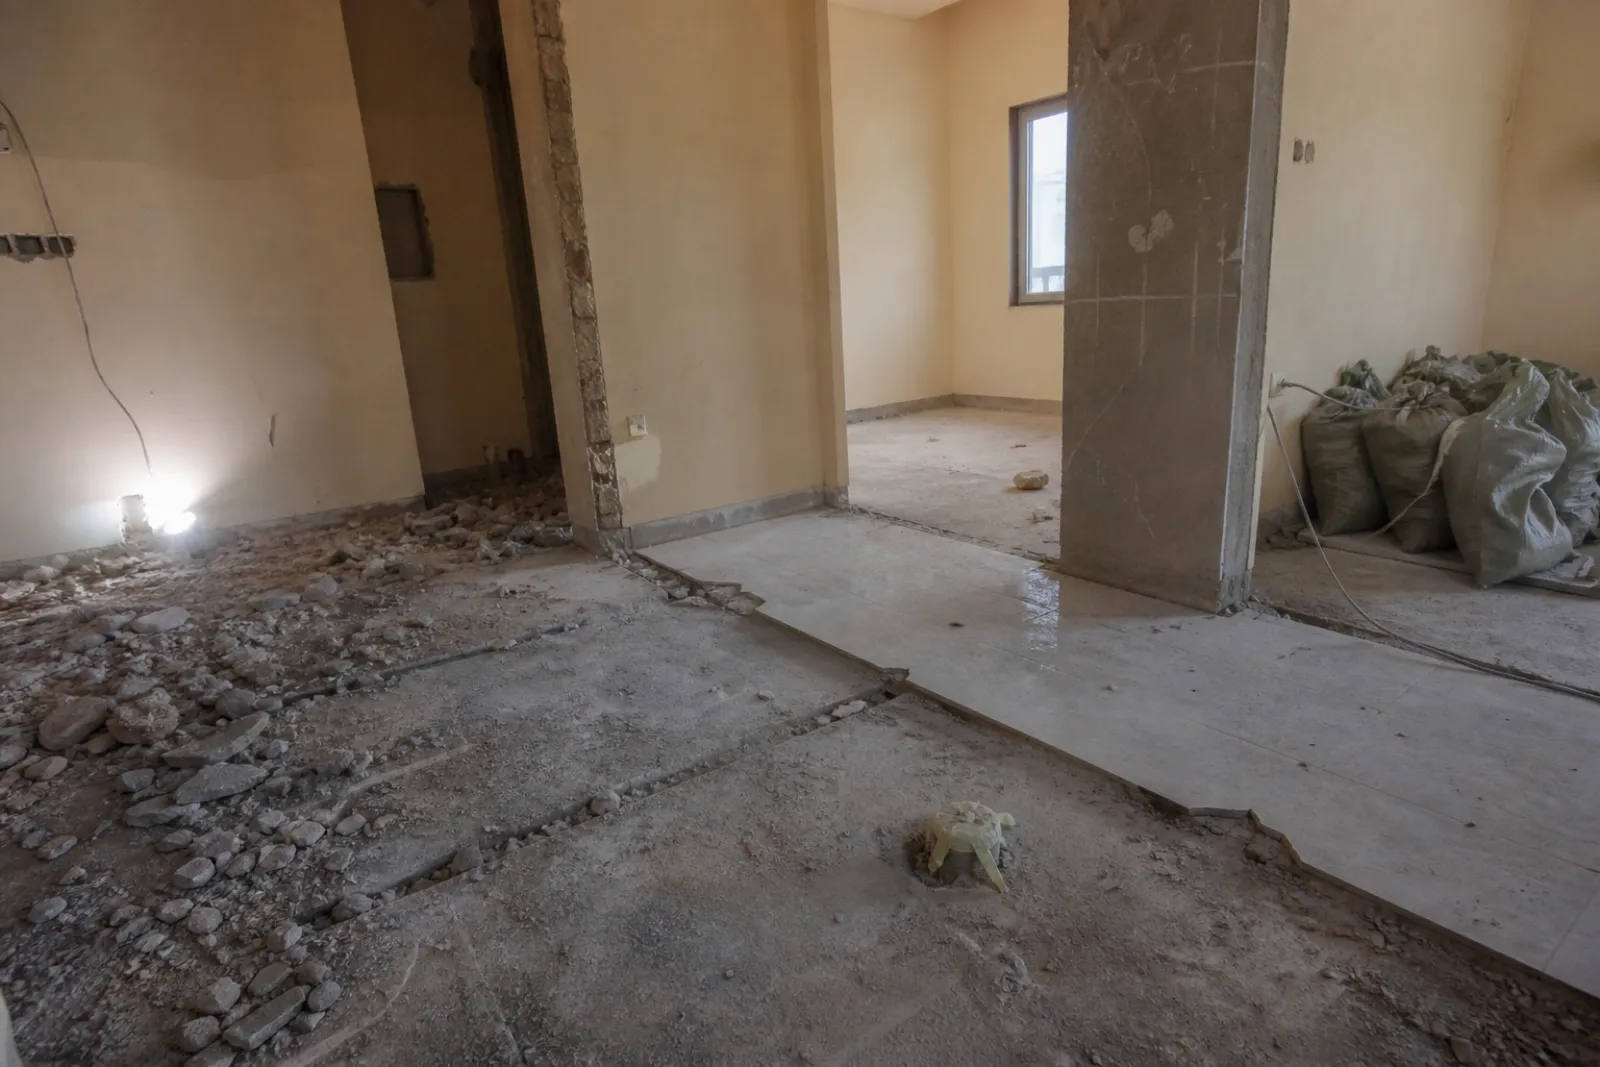
Strip-out is not demolition. In a Dubai apartment tower, it is a staged, controlled removal process that must protect three things simultaneously: the structural screed beneath the tiles, the existing drain points serving the building stack, and the ceiling of the unit directly below. When this distinction is not understood, or not respected on site, the consequences rarely stay contained to the bathroom being renovated.
Map the Screed Before the First Cut
The single highest-risk moment in any bathroom strip-out is the first pass of a jackhammer or angle grinder across an unmapped floor. Without establishing screed depth first, mechanical removal can penetrate the structural slab. A breached slab in a multi-storey tower does not behave like a crack in a wall; it creates a direct path for water to migrate downward, often invisibly, until it manifests as a stain, a blister, or an active leak in the apartment below. At that point, the scope of remediation expands from a bathroom renovation into a structural repair with building management, the affected neighbour, and potentially the owner association all involved.
Our team conducts a pre-strip structural assessment on every project before any tool is raised. We map screed depth across the floor, identify existing drain positions, check for prior moisture damage in the substrate, and record any areas where previous repairs may have altered the floor build-up. This assessment directly informs how the removal is sequenced and which methods are used in which zones.
Cap the Drains, Clear the Stack
All drain points must be temporarily capped and sealed the moment the floor is opened. Tile fragments, adhesive debris, and dust entering an uncapped drain during strip-out travel directly into the building's shared drainage stack. Clearing a stack blockage in a tower is not a straightforward job, and building management will attribute the liability to the unit carrying out the works. Drain protection is non-negotiable, and it should be confirmed as completed before mechanical removal begins on any section of the floor.
Remove the Old Membrane Entirely
Layering new waterproofing membrane over old, degraded material does not restore the system's integrity. The new membrane adheres to the surface of the old one, not to the substrate, and any delamination, residual moisture, or adhesion failure in the existing layer transfers directly to the new installation. Full removal of any prior membrane is required before the substrate can be properly prepared and a new system applied. This step adds time, but it is the only route to a waterproofing installation that will actually perform.
Notify Building Management Before Work Starts
Most Dubai residential towers operated under owner associations or master developer management require formal notification before strip-out begins. Working hours are typically restricted to weekday daytime hours, and management will often specify waste removal routes, elevator protection requirements, and rules around the use of service versus passenger lifts for debris clearance. Confirming these requirements before work starts avoids site stoppages and penalty notices mid-project. Our team handles all building management coordination as part of the pre-construction stage, so none of this falls on the client to navigate alone.
The principle running through all of these steps is the same: a thorough assessment of the substructure, with attention to joints, transitions, and drainage interfaces, must precede any surface preparation. In a Dubai apartment context, that is not advisory. It is the baseline standard our team applies on every project, because the cost of skipping it is always greater than the time saved.
Waterproofing and Tanking: The Stage That Cannot Be Rushed
With the substrate clean and the drain set-out confirmed, waterproofing is where the renovation either succeeds or stores up a serious problem for the future. Every layer that follows, screed, adhesive, tile or microcement, is only as durable as the membrane beneath it. A compromised membrane does not produce an immediate visible failure; it produces a slow, invisible migration of moisture that travels through the slab and into the ceiling of the apartment below. By the time that damage appears, the entire floor build-up above must typically be stripped back to bare concrete and the work begun again.
Full Tanking: What It Actually Covers
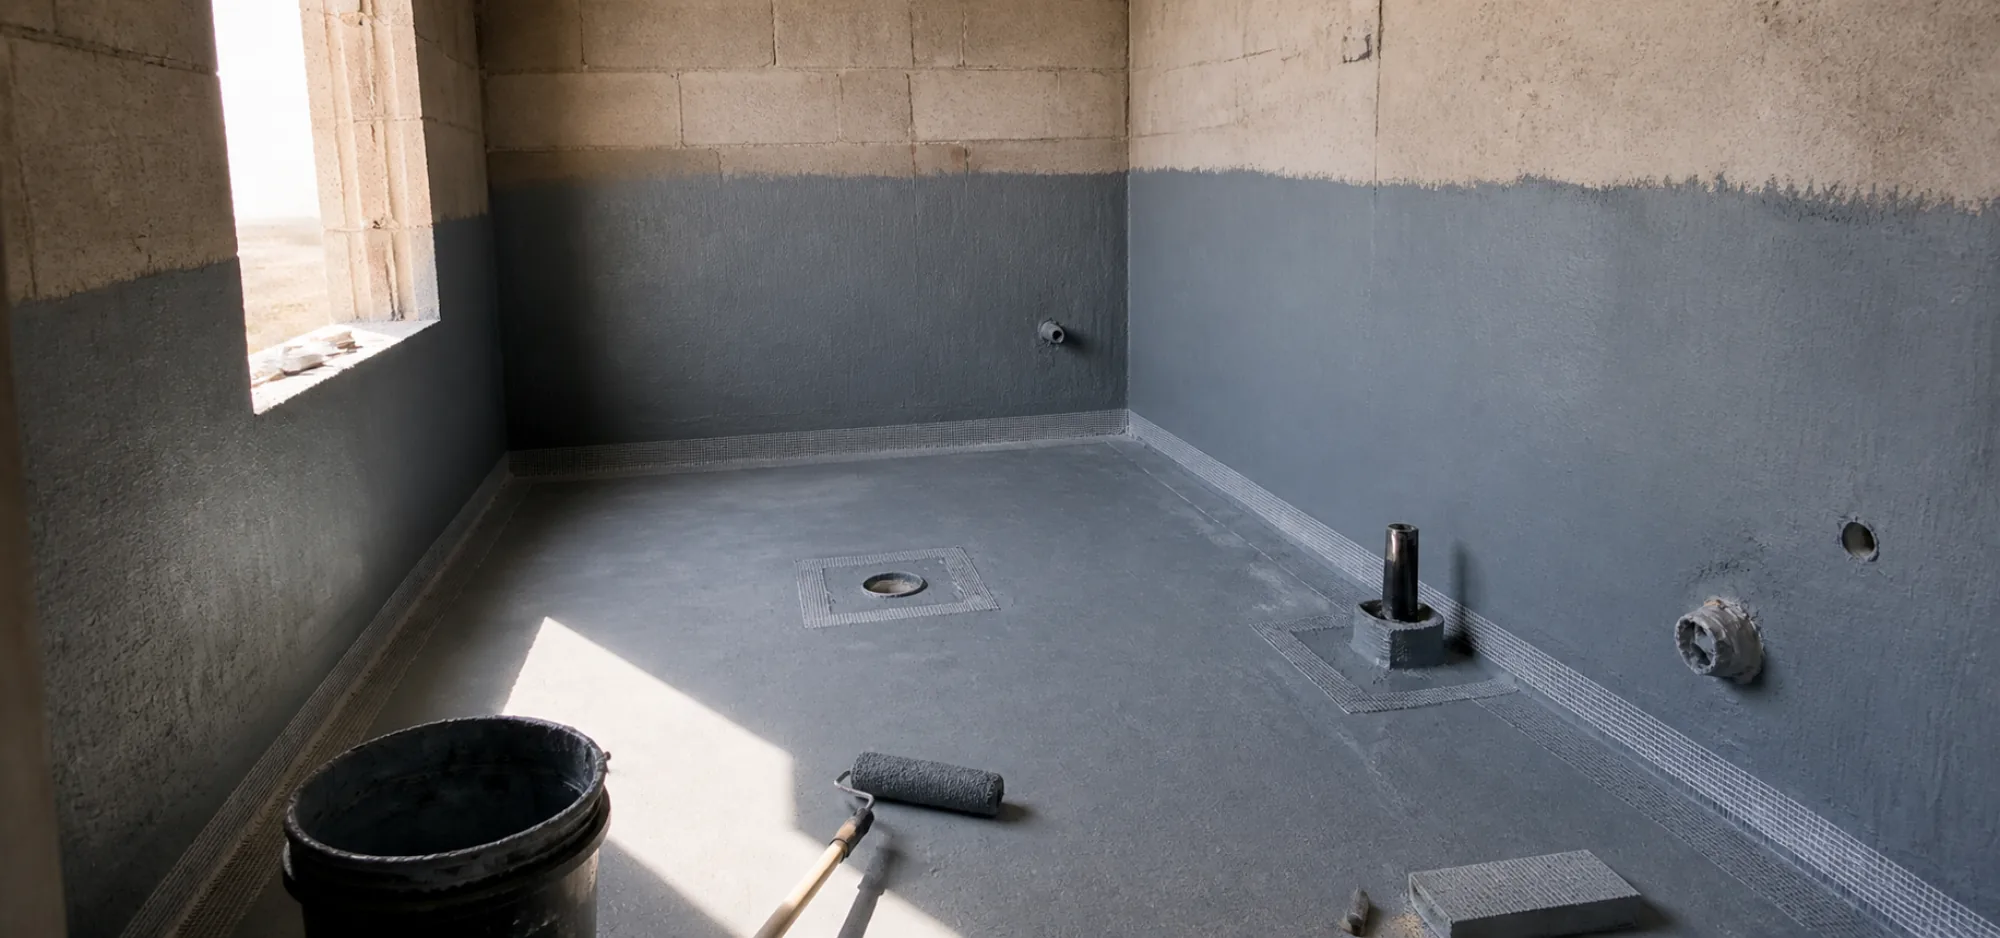
Full tanking means treating the floor slab in its entirety and turning the membrane up all four walls to the required height. This is not optional in a high-rise residential building where a leak becomes a neighbour's problem within days. The wall-floor junction is the most vulnerable transition in any wet room; water finds the path of least resistance, and an unsealed junction provides exactly that. Corners receive reinforcement tape and an additional membrane pass before the main coat is applied. The drain body itself must be integrated into the waterproofing layer, not simply surrounded by it.
Pipe Penetrations: The Failure Point Most Often Missed
Every penetration through the slab or wall, including supply pipes, waste pipes and drain sleeves, represents a gap in the membrane that must be closed deliberately. The membrane is dressed tightly around each penetration and sealed at the interface. Bridging across a penetration rather than bonding to it leaves water a direct route into the substrate. This step is treated as a separate stage in our programme, distinct from the main membrane application, because it demands individual attention at each point rather than a single pass across the surface.
Testing Before Build-Up Begins
Once the membrane is applied and fully cured, it must be water-tested before any screed, adhesive or tile is laid. This is an inspection checkpoint, not a scheduling formality that can be compressed to save time. Our Halo Shield waterproofing system is applied by our in-house team and documented photographically at every stage. Owners receive a complete photographic record of the finished membrane before the floor build-up begins, providing both quality assurance and a traceable record if any question arises later.
Tiling directly over an uncured or untested membrane is the single most common shortcut taken on bathroom renovation projects in Dubai, and it is the single most common cause of full strip-out remediation later. The cost of re-tanking a bathroom after tiles are laid is many times the cost of doing it correctly the first time. There is no recovery option that does not involve removing everything above the membrane and starting the waterproofing sequence again from the slab.
Drainage, Falls, and What Moving a Drain Point Triggers
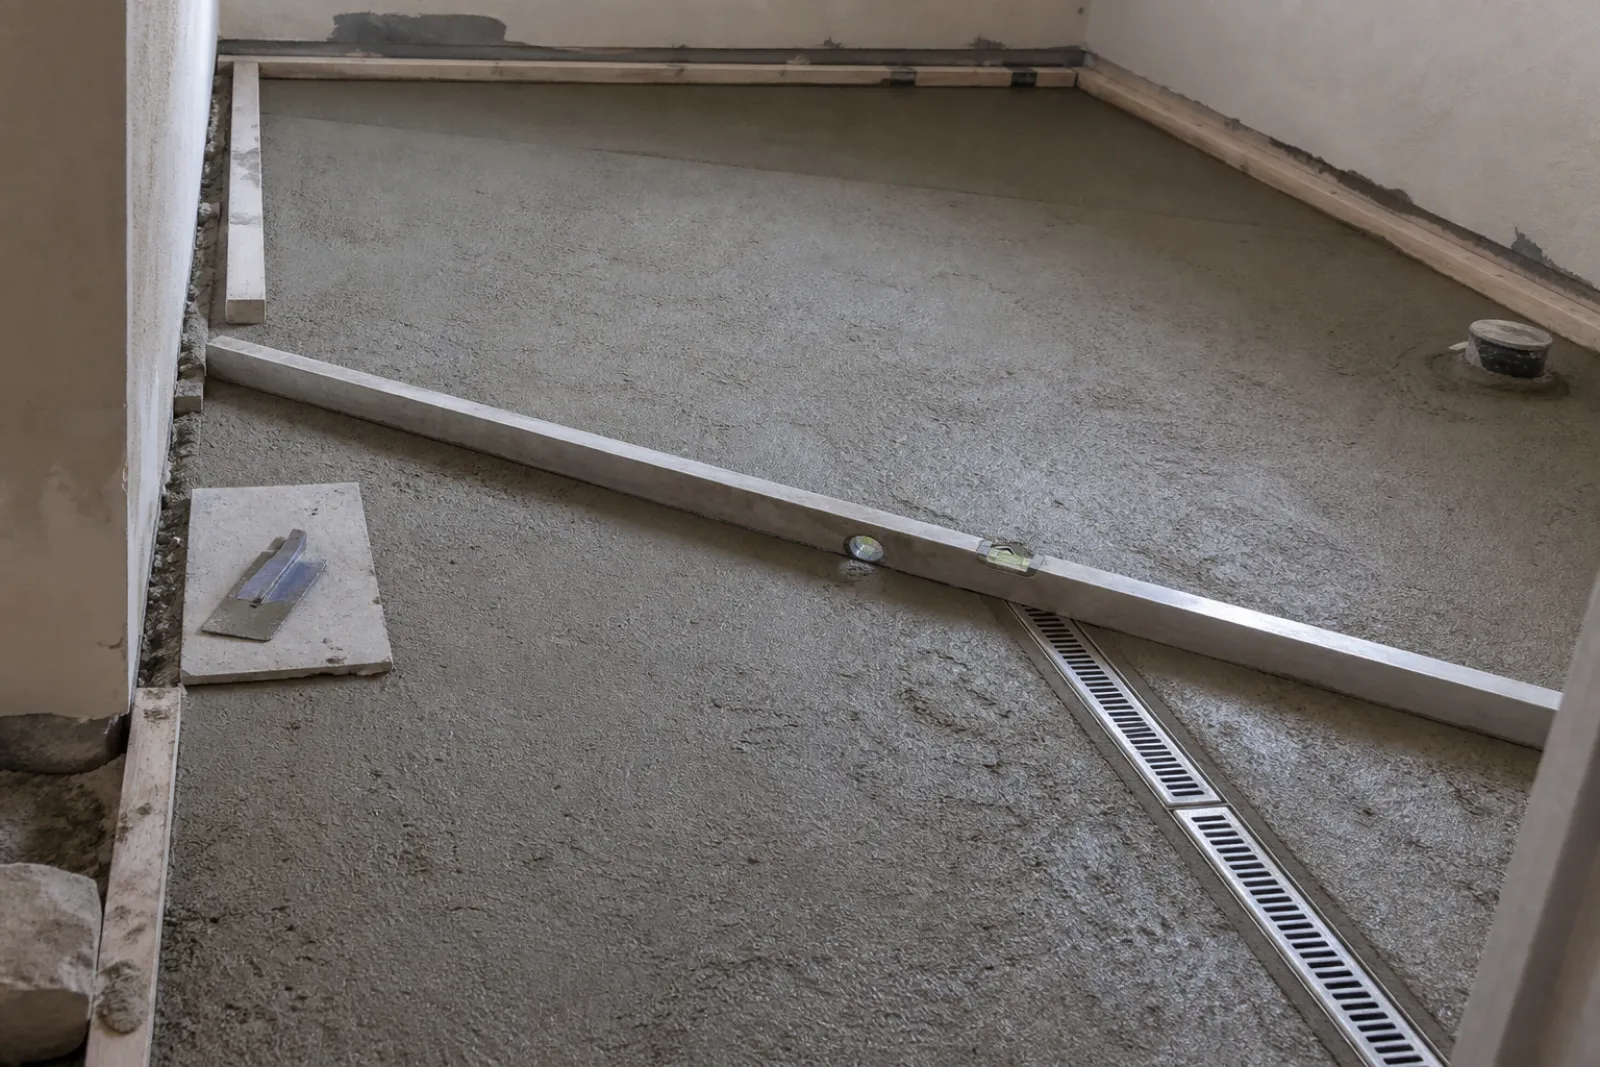
Falls are the slope engineered into the floor screed to direct water toward the drain point. Without correct falls, water sits on what appears to be a level surface and finds its own route out, typically through grout joints, wall junctions, or the perimeter seal where the floor meets the wall upstand. By the time that movement becomes visible, it has usually been travelling through the substrate for some time.
Falls Must Be Set Before Any Tile Goes Down
The fall profile must be formed in the screed layer itself, not corrected with adhesive thickness after the fact. It must be consistent across the entire wet area, accounting for the drain body height, any level change at a step or threshold, and the geometry of the drain type selected. A point drain pulls water from all directions toward a central outlet; a linear drain requires a single-plane fall across the full floor width. Both demand precise screeding before waterproofing membrane application, and the membrane must follow that fall profile exactly. Applying membrane to a flat screed and hoping the tiles compensate is not a compliant approach and will not produce a draining floor.
When Moving the Drain Point Triggers a Permit
Repositioning a drain point, even by a short distance, requires cutting into the structural slab and modifying the connection to the building's drainage stack. Under the Dubai Building Code (2021 Edition), any modification that touches the structural slab or the below-slab drainage network requires a formal Dubai Municipality permit supported by approved drawings. Depending on what services run through or adjacent to the slab, a DEWA notification may also be required before cutting commences.
As DM Approved and DEWA Certified contractors, our team manages the full approvals process in-house. Our structural engineers and draftsmen prepare the required documentation before any slab work begins; we do not start cutting until the permit is in hand. Attempting to relocate a drain without a permit carries a genuine risk that the building authority will require full reinstatement at the owner's cost, an outcome that is both disruptive and expensive. Where drain relocation can be avoided through careful redesign, we will always recommend that route first.
MEP First Fix: Concealed Cisterns, Valve Access, and Getting the Sequence Right
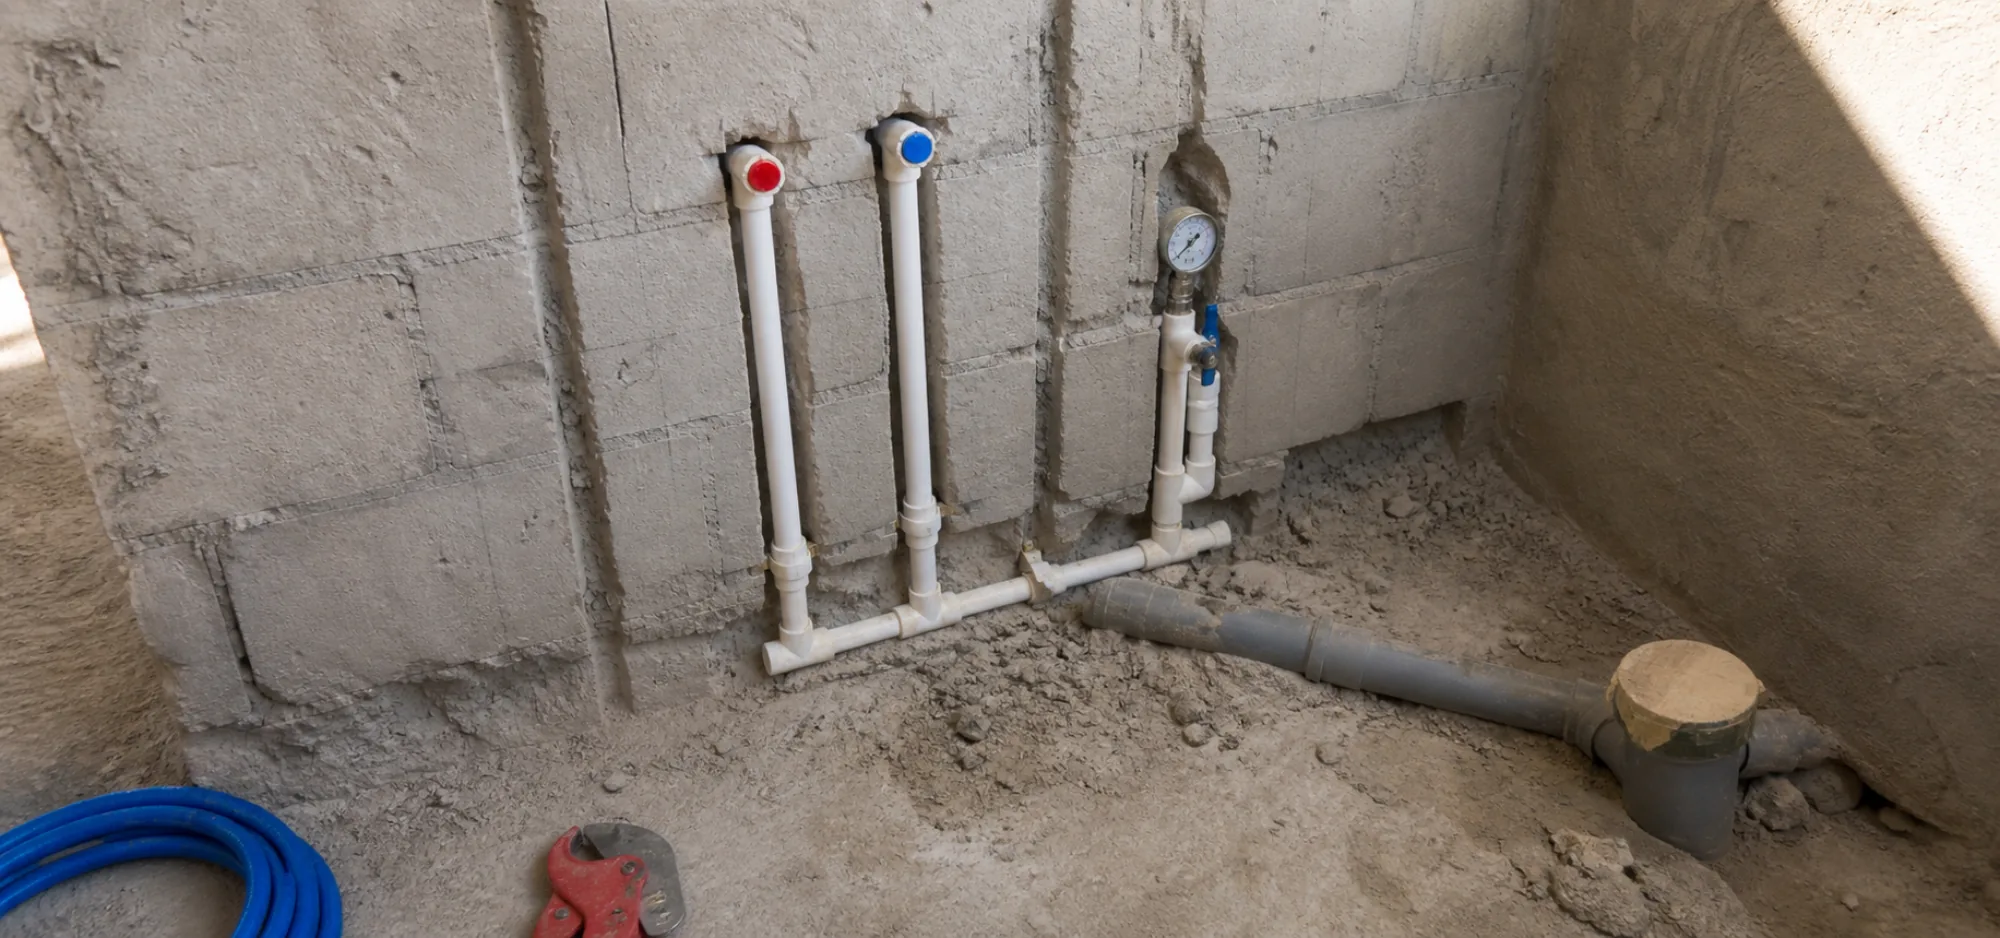
MEP first fix covers everything that disappears behind the walls before boarding and tiling begins. This means all hot and cold supply lines, waste connections, concealed cistern frames, shower valve bodies, electrical conduit for lighting circuits, shaver socket feeds, and any wiring for heated elements. Every element in this list must be fully installed, pressure-tested, and signed off before a single board is fixed or a tile goes on. Once walls are closed, these systems are inaccessible. Any fault found after tiling means cutting out finished surfaces, which adds cost and programme time that is entirely avoidable.
Access Panels and Tile Layout Must Be Resolved Together
Concealed cistern frames and in-wall valve assemblies require access panels, and the position of those panels is not a detail to resolve later. The panel dimensions must be confirmed before the tile layout is drawn, because a large-format tile grid will not accommodate a poorly positioned opening without visible cuts or compromised joints. Where access falls mid-tile on a 600 x 1200 format, the result is either an awkward cut or an access panel that does not sit flush. Our team resolves this at the pre-tile set-out stage, not after the first row is fixed to the wall.
As-Built Drawings and the Building Record
Any change to supply line routing, any new outlet point added during the renovation, must be recorded in updated as-built drawings held in the building file. This is not a formality. Future maintenance, any subsequent renovation, and any building authority inspection all depend on an accurate record of what is behind the walls. Our in-house draftsmen update these drawings as part of the delivery process, so the building file reflects what was actually installed, not what was planned at design stage.
One Programme, One Contract, No Coordination Delay
Our in-house MEP and HVAC team works within the same programme as the fit-out team, under the same project manager and the same contract. There is no handover between a plumbing subcontractor and a tiling subcontractor, no waiting for one trade to sign off before another can proceed. The first fix scope runs concurrently with the substrate and waterproofing stages, so the programme does not carry a gap between MEP completion and the start of wall preparation.
In Dubai, any work touching electrical or water supply installations must be carried out by DEWA-certified operatives. Our DEWA certification means every installation is compliant and inspectable without requiring a separate third-party sign-off. The work goes on record correctly from the outset.
Tiling Versus Seamless Finishes: Choosing the Right Surface for a Wet Room
Ceramic and porcelain tile remains the most widely specified finish in Dubai bathrooms, and the reasons are straightforward: it is durable, fully moisture-resistant at the glazed face, and available in formats that suit every budget and design brief. The supply chain across the emirate is deep, and a damaged tile can be cut out and replaced from attic stock with an invisible result. The weakness is the joint. Grout is the porous component in an otherwise inert surface, and Dubai's hard water supply accelerates scale build-up and detergent residue in grout lines faster than in softer-water climates. Grout that is not properly sealed becomes a moisture pathway, and a moisture pathway in a wet room is precisely what the waterproofing beneath was installed to prevent.
Large-format tiles address this directly by reducing the total number of joints. They are increasingly specified in contemporary and minimalist bathroom schemes across Dubai's premium residential sector, but they demand a flatter substrate and more precise adhesive bed control than smaller formats. The installation tolerance is tighter, which is one reason substrate preparation is never a stage to compress.
Microcement as a Seamless Alternative
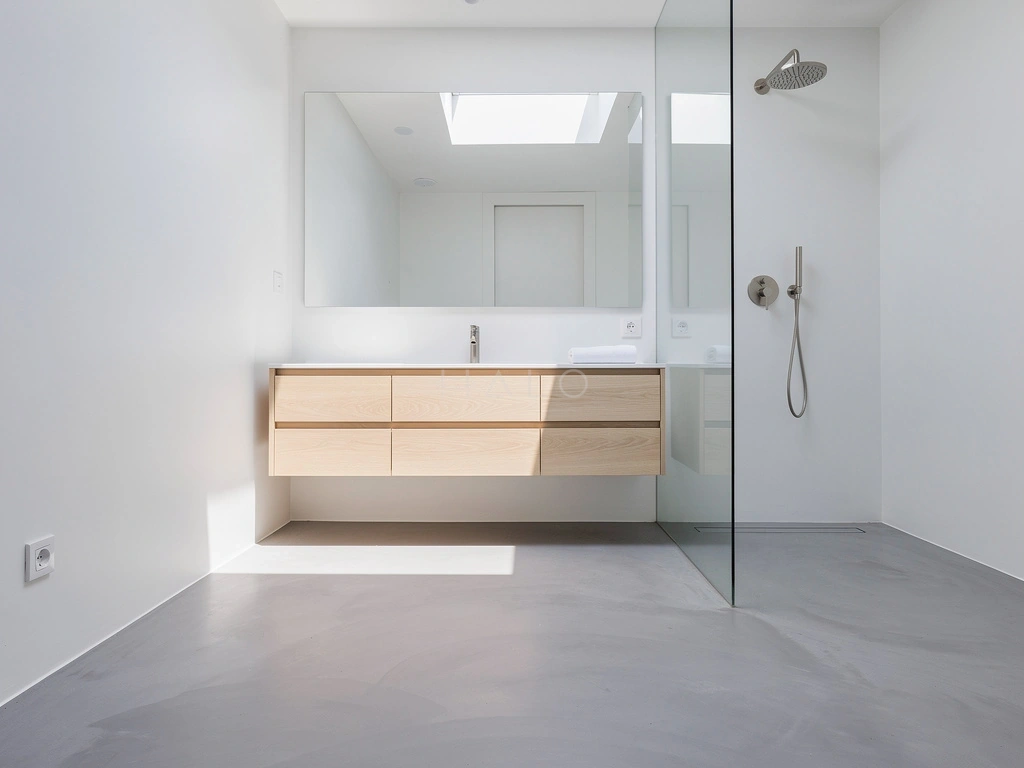
Microcement for bathroom renovation is a cementitious polymer coating trowelled in thin coats over a prepared and primed substrate, finished with a sealer. It eliminates grout lines entirely, producing a continuous surface across floors and walls with no visual interruption. The aesthetic suits Japandi, minimalist, and wellness bathroom schemes, which represent a significant share of Dubai's premium residential and hospitality pipeline. In a renovation context specifically, microcement carries a practical advantage: it can be applied over existing tile, which removes the need for full demolition and reduces both programme time and disruption to neighbouring units.
The performance of microcement in a wet room is entirely conditional on correct execution. The substrate must be properly prepared and primed. The product selected must be rated for wet-area use. And the sealing must be complete, with no missed zones at corners, niches, or transition points. An unsealed or under-sealed microcement surface in a shower will absorb moisture and degrade. This is not a material limitation; it is an installation failure. Re-sealing at intervals is also an ongoing maintenance commitment that clients should factor into their decision.
Slip resistance deserves a specific note for shower floors. Glazed tiles can be specified with published wet-duty slip ratings off the shelf. Microcement floor finishes require deliberate specification of the sealer system to achieve equivalent barefoot wet performance, and this must be addressed at the product selection stage rather than retrospectively.
One Substrate Standard for Both Finishes
Our tile installation team and our microcement specialists work from the same substrate preparation standards. Neither finish is applied until the waterproofed and screeded floor has been inspected and approved. The logic is simple: the most expensive surface finish cannot compensate for a compromised layer beneath it. The choice between tile and microcement is primarily aesthetic and maintenance-driven. Both are appropriate for Dubai bathrooms when applied correctly over a sound, waterproofed substrate. What determines long-term performance is not which surface sits on top, but the quality of everything underneath it.
Ventilation in Internal Bathrooms: A Dubai-Specific Requirement
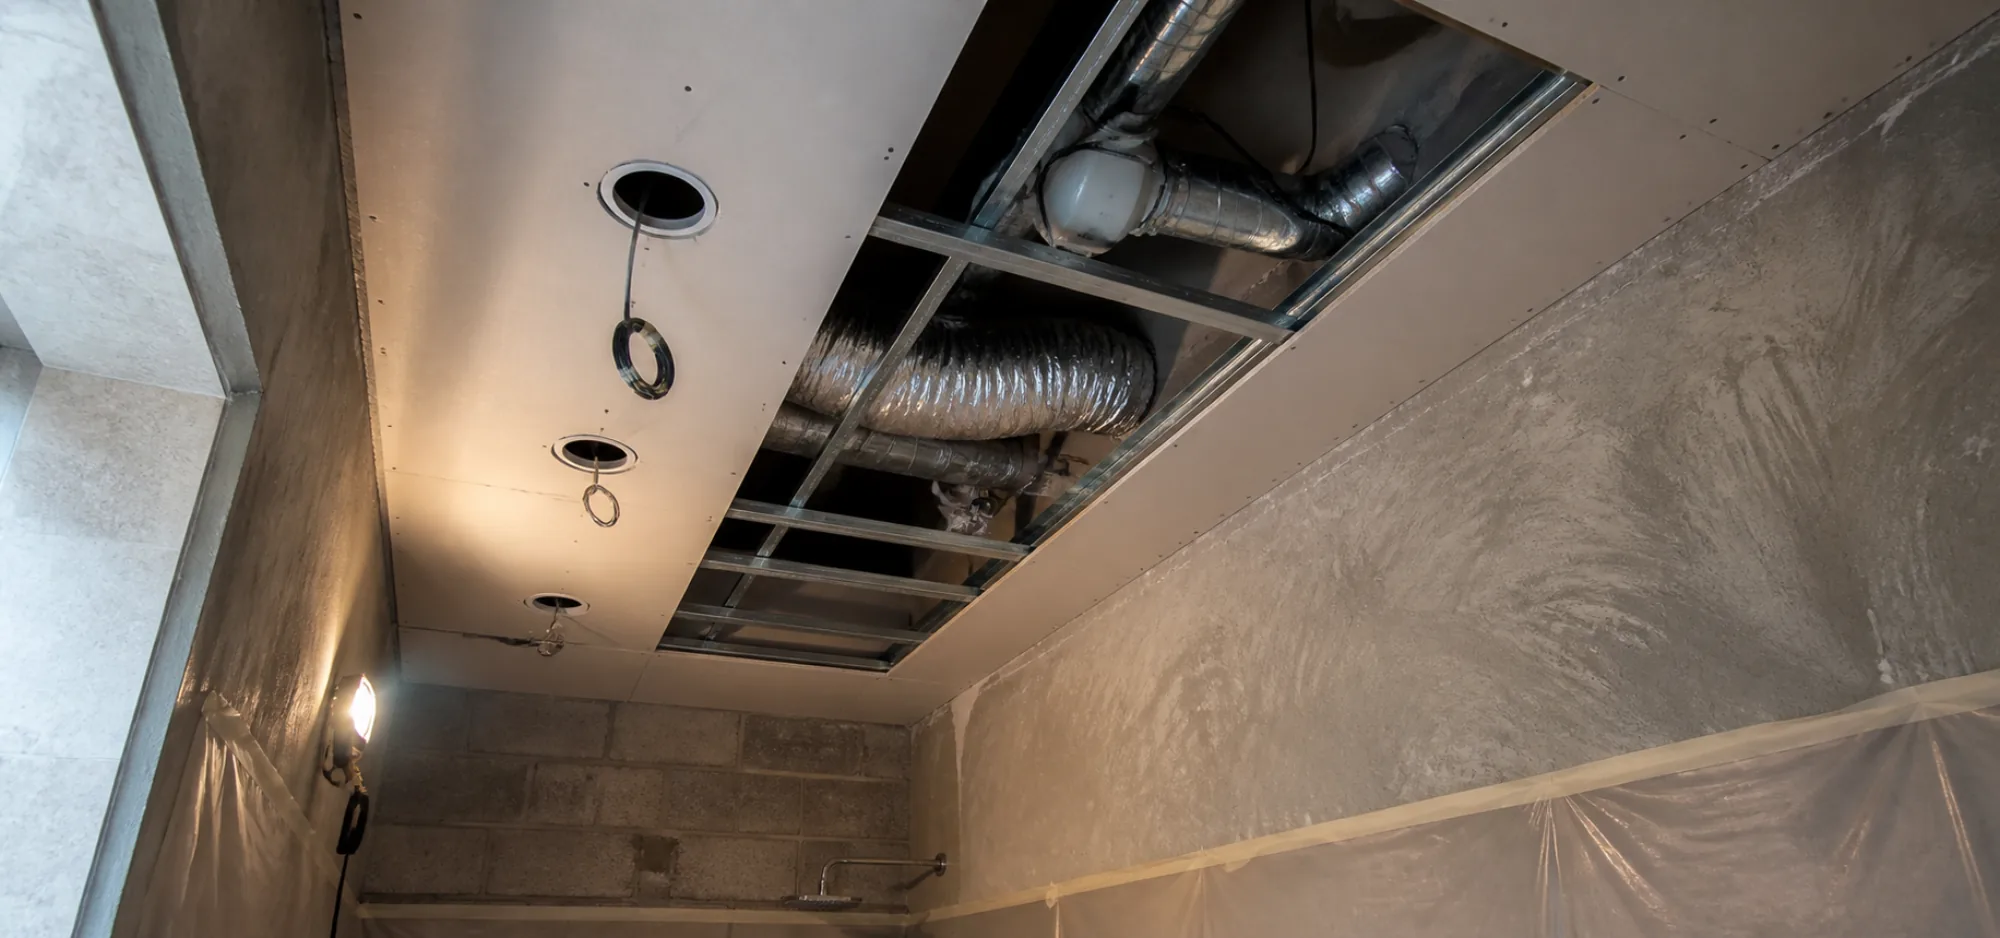
A significant proportion of Dubai apartment bathrooms are internal rooms with no external wall, no window, and no natural air movement. In these spaces, mechanical extract ventilation is not optional; it is the only means by which moisture leaves the room. Without it, every shower, every run of hot water, deposits humidity that has nowhere to go.
The consequences are not cosmetic. Persistent humidity degrades grout joints, promotes mould growth behind wall finishes and ceiling boards, and eventually attacks the waterproofing membrane from the interior side. A membrane that was correctly installed and passed its water test at the build stage can be compromised over years by sustained interior moisture loading. By the time that failure becomes visible, the damage has typically already reached the substrate.
Correct Duct Termination Is Non-Negotiable
The extract duct must be routed to an external discharge point. Connecting to a return air plenum or allowing flexible duct to terminate within a ceiling void does not constitute ventilation; it redirects humid air into the building fabric and creates a different set of moisture problems. In Dubai's high-rise apartment stock, the extract route typically connects to a dedicated mechanical ventilation riser shaft serving the building. Our MEP team verifies that the riser is active and unobstructed before any duct connection is made; this cannot be assumed without physical inspection.
Fan Capacity and Duct Sizing
Retaining an existing extract fan during a renovation without assessing its performance against the current room volume is a common oversight. If a bathroom has been reconfigured, if ceiling heights differ from the original layout, or if the duct run has been extended, the original fan specification may be inadequate. Our MEP and HVAC team sizes extract capacity against actual room volume and verifies that the duct diameter can carry the required airflow without resistance-induced losses. An undersized duct feeding an oversized fan produces noise, fan strain, and reduced effective airflow simultaneously.
Any modification to the extract route that penetrates a fire-rated ceiling or partition introduces a fire compartmentation obligation. Penetrations in fire-rated assemblies require compliant fire-stopping measures, and the modification must be coordinated with the building's existing MEP and fire safety documentation. Our in-house MEP team handles this coordination as part of the fit-out scope rather than leaving it as an unresolved interface between trades.
For en-suite bathrooms with an external wall, natural ventilation through an operable window is theoretically available. In practice, during Dubai's summer months, windows remain closed because outdoor air at that humidity level worsens interior conditions rather than improving them. Mechanical extract backup is therefore standard in our specifications regardless of whether a natural ventilation opening exists.
Vanity Joinery: Moisture Resistance Starts at the Board Level
A bathroom vanity unit is not furniture placed in a wet room. It is a joinery item specified, built, and installed for permanent residence in one of the most demanding environments in any property. The substrate board, adhesive, edge treatment, and finish must all be selected for that reality from the outset. Adapting dry-area joinery practice to a bathroom setting is one of the most common specification errors we encounter when assessing failed vanity units across Dubai apartments.
Board Grade Is Not Optional
Standard MDF has no place in a Dubai bathroom carcass. It absorbs moisture at every unprotected cut edge and unfinished face, and in an environment that cycles between air-conditioned interiors and the high ambient humidity of a Dubai summer, the swelling and delamination process accelerates sharply. The correct specification for carcass construction is moisture-resistant board, either MR-grade MDF for standard bathroom exposure or marine-grade plywood where the panel is subject to intermittent wetting, such as at sink bases and floor-level panels. Marine-grade plywood uses waterproof adhesive bonding and void-free cores that eliminate the hidden moisture traps common in lower-grade sheet materials.
Edge sealing is as consequential as board selection. Lacquered or foil-faced door and drawer fronts that are cut without re-sealing the exposed substrate edge will absorb moisture directly at that line, bypassing the moisture-resistant properties of the board entirely. Every field cut made on site must be sealed before installation. For higher-exposure applications, solid timber or moisture-resistant wrapped finishes on doors and drawer fronts remove this vulnerability by eliminating the composite substrate from the most exposed surfaces.
Base Detail and Floor-Level Management
Standing water on a bathroom floor is a routine condition, not an edge case. A vanity carcass base that contacts the finished floor surface directly will absorb moisture through the base panel over time, regardless of board grade. The correct approach is a plinth or adjustable leg system that lifts the carcass clear of the floor and any pooled water. This single detail separates purpose-built bathroom joinery from adapted furniture-grade cabinetry, and it is a specification point our team confirms at the design stage, not as an afterthought on site.
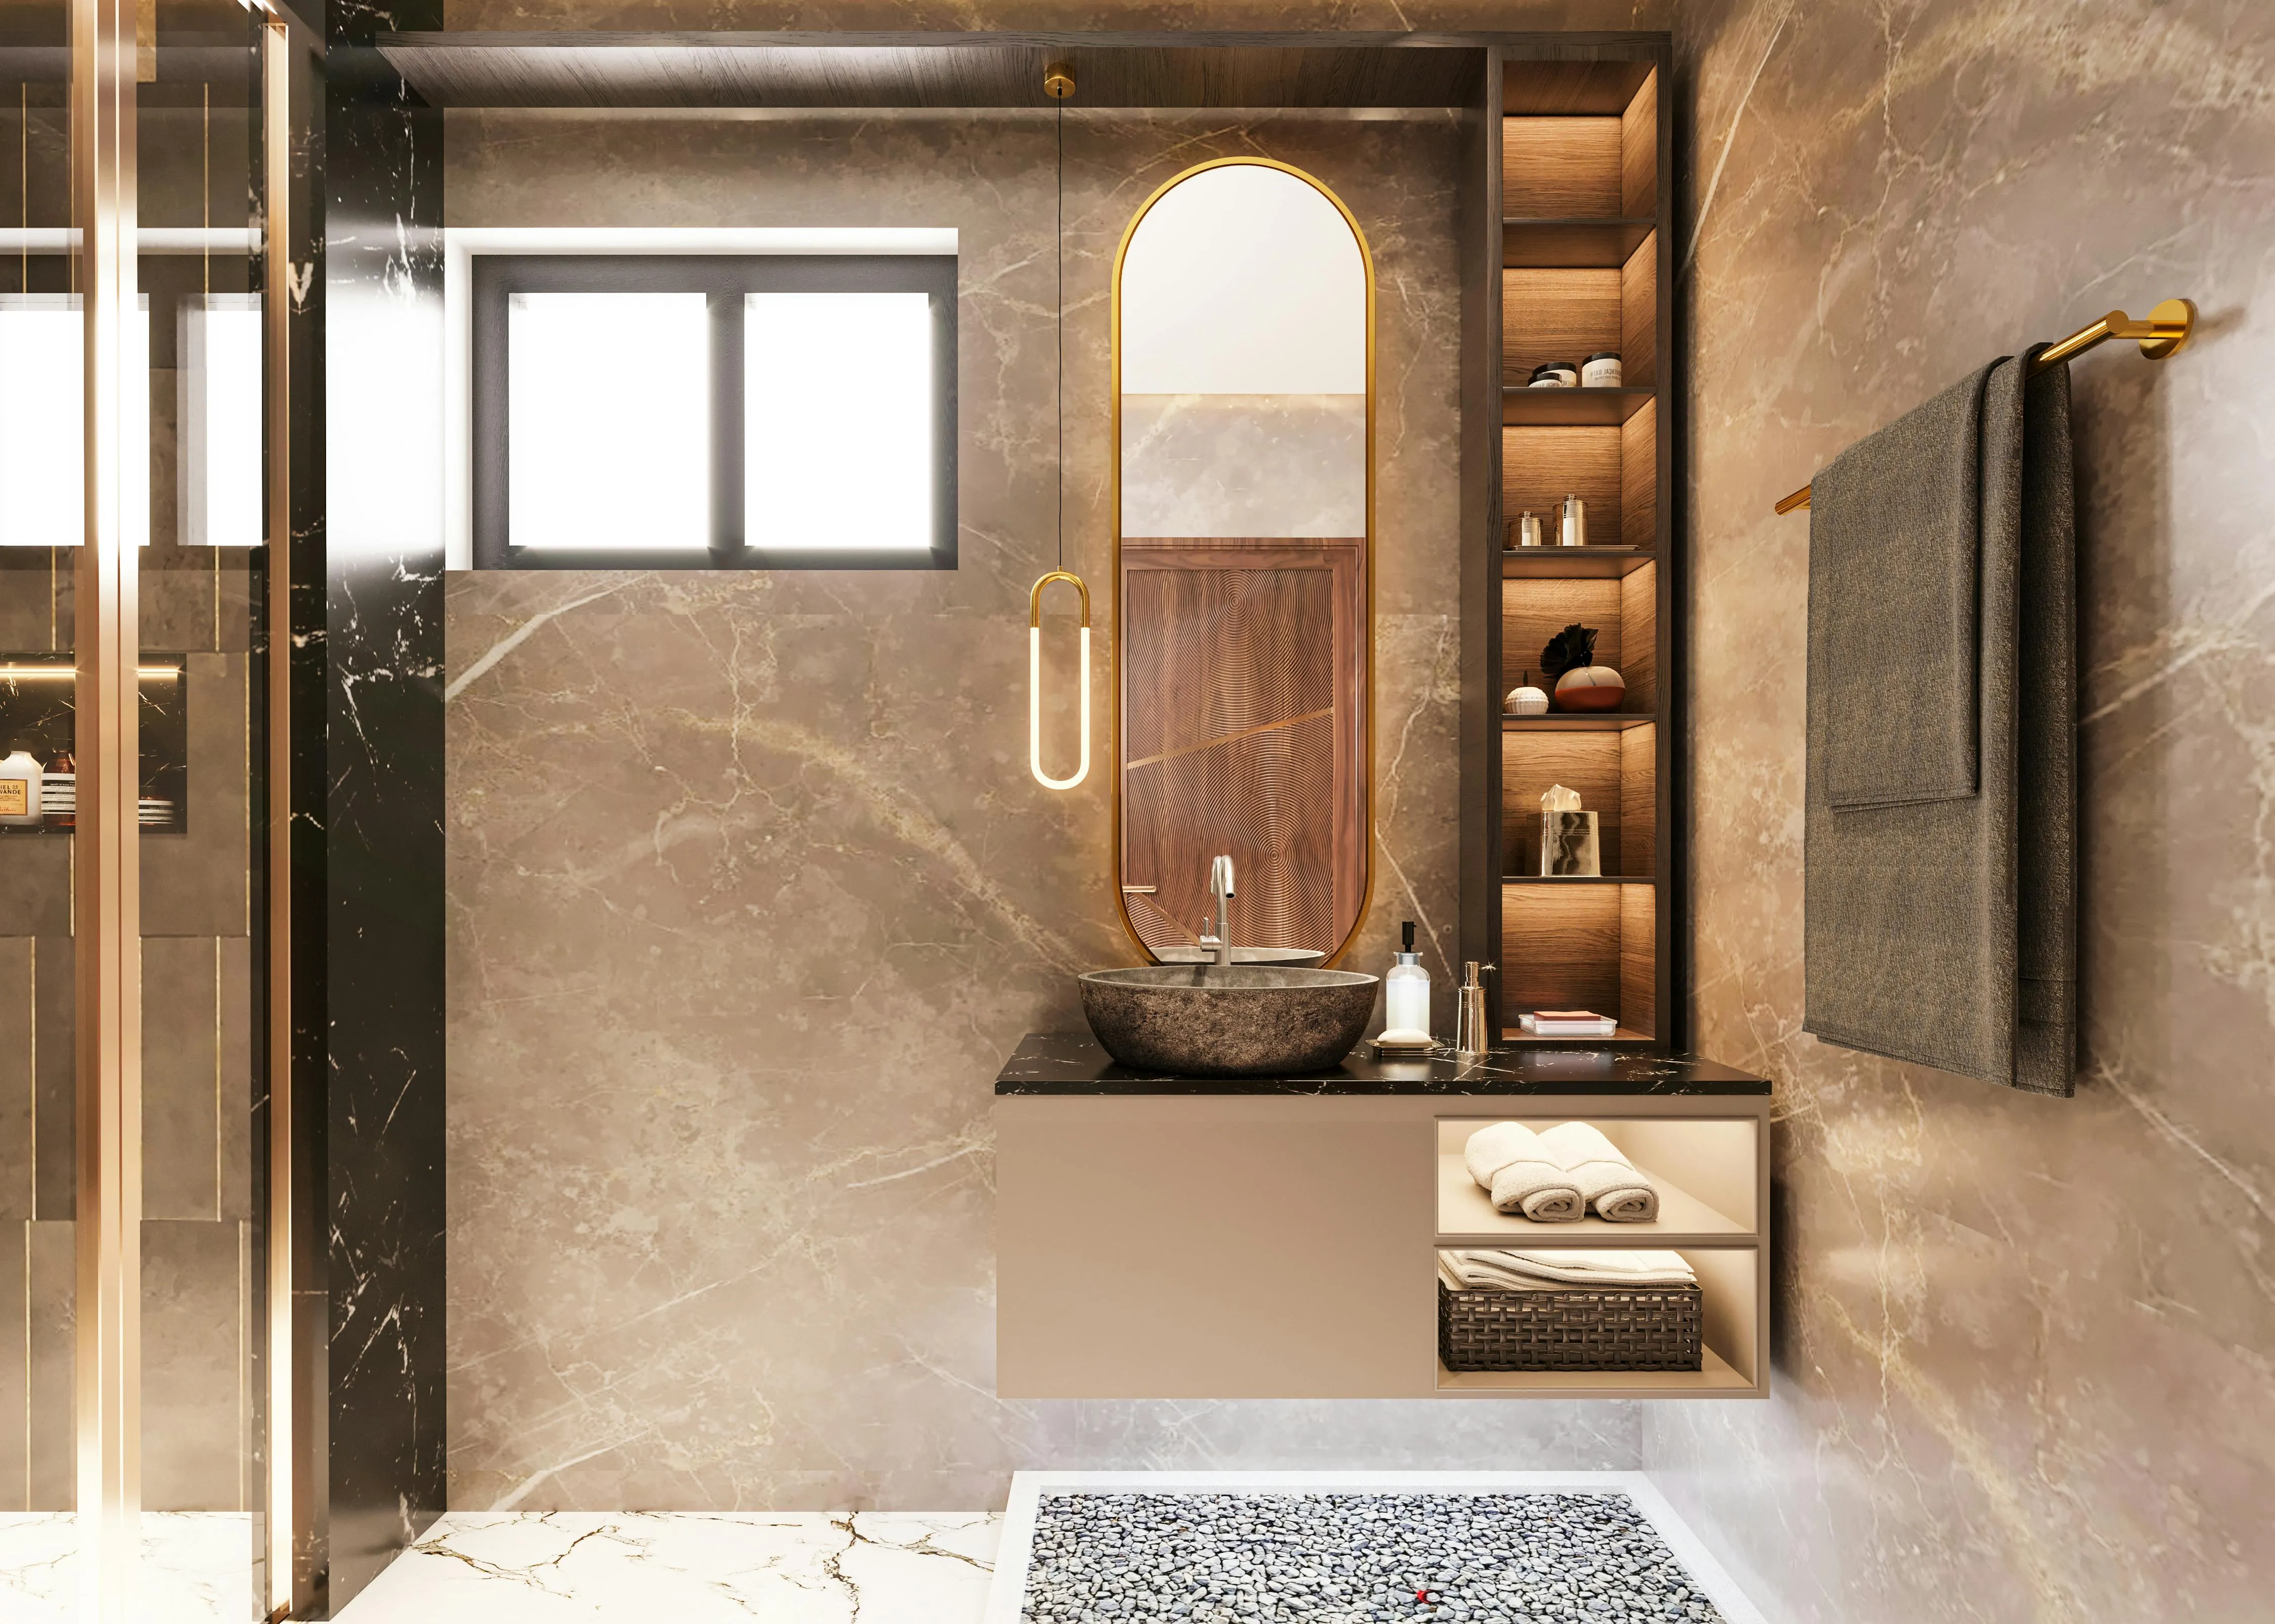
Manufactured In-House, Specified for the Location
Our bespoke bathroom vanity units are manufactured at our 15,000 sq ft Al Quoz joinery facility by a team of 75 carpenters and painters. Every substrate decision, adhesive selection, edge treatment, and finish application is made under one roof and quality-checked before the unit leaves for site. Material substitution during production, a common risk when multiple subcontractors are involved, does not occur because the entire process is ours.
Bespoke sizing is standard practice for us rather than a premium option. Dubai apartment bathrooms are designed around built-in joinery runs, and the available space rarely aligns with off-the-shelf module widths. A unit built to the exact run dimension integrates correctly with the adjacent tiling, sits at the right height for the finished floor level, and fills the space as it was intended to be filled.
Stage-by-Stage: A Realistic Renovation Timeline
| Stage | Activity | Notes |
|---|---|---|
| 1. Pre-construction | Design sign-off, material procurement, DM permit application if drainage is being relocated, building management NOC, site protection set-up | Authority approval timing sits outside the on-site programme; begin early |
| 2. Strip-out | Controlled removal of tiles, sanitaryware, and fixtures; structural assessment; capping of existing drain points | Hidden substrate defects are identified and reported at this stage |
| 3. First fix MEP | Supply line rerouting, concealed cistern frames, electrical conduits, extract duct installation; all pressure-tested before closing | No wall or floor surface closes until pressure tests are signed off |
| 4. Waterproofing and tanking | Full floor and wall membrane application; water test conducted; formal sign-off issued before any screed is poured | The single most consequential sign-off in the entire programme |
| 5. Screed and falls | Floor screed laid to correct falls toward the drain point; screed allowed to cure fully before tiling begins | Rushing the cure period compromises both the screed bond and the tile adhesion above |
| 6. Substrate preparation and finishes | Wall and floor finishes applied to approved substrate; concealed access panels positioned within the tile layout | Whether the finish is ceramic tile or seamless microcement, substrate flatness is non-negotiable |
| 7. Vanity joinery and second fix | Vanity unit fitted; sanitaryware connected; tap sets, shower valves, and accessories installed | Joinery installation precedes final sanitaryware connection to allow clean alignment |
| 8. Snagging and wet test | Drain flow test, valve operation check, extract performance verification, grout and seal inspection, joinery fit review | No handover is issued until every wet-test item is closed out |
On a standard Dubai apartment bathroom, the on-site programme from strip-out to snagging sign-off runs two to three weeks, based on our delivery experience across 1,200-plus projects. That window assumes materials are on site and no remedial structural work is required. What sits outside that window is the pre-construction phase: building management NOC applications, DM permit processing where drainage is being relocated, and procurement lead times for specified sanitaryware or bespoke joinery. The practical advice is to treat authority approvals as a parallel workstream that begins the moment scope is agreed, not something to address once demolition is underway. Projects that compress or skip the pre-construction stage do not save time; they create the conditions for a site stop.
Snagging a Wet Room: What a Proper Sign-Off Actually Covers
Snagging a bathroom is a functional test of every system installed, conducted before the client accepts handover. By the time our team begins the sign-off process, every concealed element is already behind a finished surface, which is precisely why the sequence matters: critical checks happen at intermediate stages, not only at the final walkthrough.
The drain is tested under live flow conditions to confirm the fall gradient is performing as designed. Water is run across the full floor surface to verify it tracks to the drain point without pooling at any location. A dry floor looks level even when the falls are insufficient; only a flow test reveals the problem.
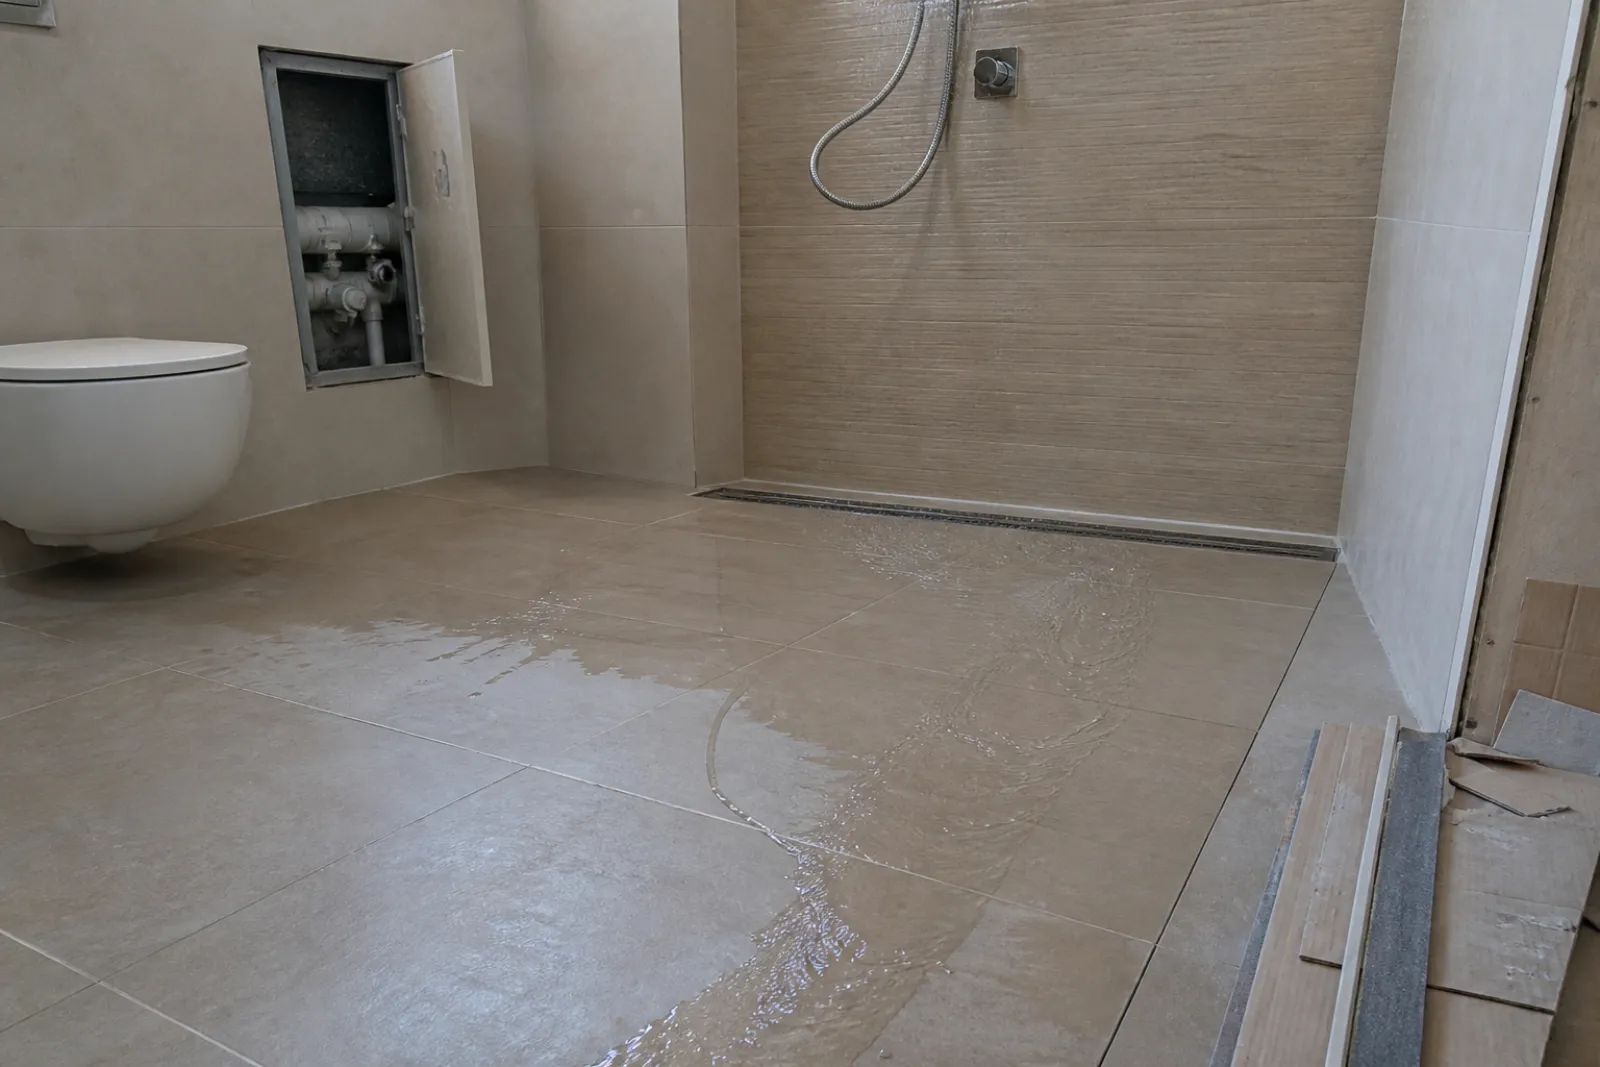
All valve assemblies, concealed cistern actuators, and thermostatic controls are operated through their full range before wall tiles and access panels are signed off. Any fault found after tiling requires destructive opening to reach the component. Our MEP team sequences these checks to ensure no concealed item is accepted as complete until it has been confirmed functional under operating conditions.
Grout joints and silicone seals are inspected at every wall-floor junction, around the bath or shower tray, and at each penetration point. These are the locations that fail first in service, particularly in Dubai, where AC-driven thermal cycling puts continuous stress on silicone, causing adhesion to break down at the bond line before any surface defect becomes visible.
Extract ventilation is confirmed operational with discharge verified at the external termination point, not simply audible at the grille. An intact grille with an incomplete or obstructed duct run will pass a casual inspection and fail in use.
Our independent property snagging work across 10,000-plus inspections has given our team a precise understanding of where bathrooms deteriorate first. We apply that same standard to our own projects. Defects liability in standard Dubai renovation contracts is contractually set at 12 months; our snagging process is designed to remove remediation calls entirely within that period, not to use the warranty as a fallback.
Frequently Asked Questions
Do I need a permit to renovate a bathroom in Dubai?
It depends on the scope of work. Cosmetic renovations, replacing tiles, sanitaryware, or fixtures on existing drain and supply points, typically require only a building management NOC before work begins. Once you relocate a drain point, alter structural elements, or modify MEP routes, a Dubai Municipality permit becomes a requirement. Our team manages all authority approvals as part of the project scope, so nothing proceeds on site until the correct permissions are in place.
How long does a bathroom renovation take in Dubai?
A standard apartment bathroom typically takes two to three weeks on site once materials are procured and approvals are confirmed. That figure covers strip-out through to second fix and snagging. Pre-construction, covering design sign-off, material procurement, building management NOC, and a DM permit if drainage relocation is involved, adds further time before the first tool touches the wall. Bathrooms requiring drainage relocation or bespoke joinery will run longer than this baseline.
What is the most common reason bathroom renovations fail in Dubai?
Waterproofing failure. The damage is invisible at handover and typically surfaces months later as moisture damage to the unit below, which is also the costliest scenario to remediate. The root cause is almost always application sequence or insufficient membrane coverage rather than the product itself. A membrane applied at incorrect thickness, or one that is tiled over before it has cured and been water-tested, will not perform, regardless of its specification.
Can I keep costs down by coordinating separate trades rather than one contractor?
Splitting the work across a separate plumber, tiler, and joiner increases the risk of sequence errors that cost more to resolve than the initial saving. The most critical failure points are a tiler proceeding before waterproofing has been signed off, and joinery being sized to a floor level that subsequently changes after screed. A single turnkey contractor carries responsibility for the complete sequence and cannot attribute failures to another trade. That accountability is part of what you are engaging.
What is Halo Shield and is it required for all bathroom renovations?
Halo Shield is our in-house waterproofing system, applied and inspected by our own team on every Halo bathroom project as standard. There is no regulatory requirement to use any specific branded system, but any membrane applied must be suitable for wet room use, correctly applied to the full tanking area, and water-tested before substrate work proceeds. Halo Shield exists because managing waterproofing in-house, rather than subcontracting it, is the only way to maintain consistent quality control over the stage that carries the most risk.
Plan Your Bathroom Renovation with Halo
We have been delivering bathroom renovations across Dubai since 1996, completing over 1,200 projects and carrying out more than 10,000 property inspections. Our team is DM Approved and DEWA Certified, and we hold a 4.9 Google rating from verified clients. That track record shapes how we approach every bathroom renovation we take on, from a single apartment wet room to a full multi-bathroom villa overhaul.
Our turnkey model means every stage described in this guide sits under one contract and one point of accountability. Design, authority approvals, waterproofing under our Halo Shield service, MEP first and second fix, tile installation or microcement finishes, bespoke vanity joinery, and full snagging are all executed in-house by our own team. There is no chain of subcontractors to manage, no gaps in responsibility, and no ambiguity about who is accountable if something needs resolving.
Every vanity unit and bathroom cabinet we install is manufactured to order at our 15,000 sq ft joinery facility in Al Quoz, using moisture-rated board and hardware specified for wet environments. Our joinery manufacturing heritage spans over 25 years, and the same standards applied to a luxury hotel installation apply to a single residential bathroom.